Menu
header photo

Title

Subtitle

Blog Component

Home improvement products that are wrong for the job


Just as there's a right tool for every job, there are plenty of wrong tools for the same job, not to mention others that might work alright but should be used only in a pinch. Duct tape is a case in point. It's great for taping virtually everything on the planet, but it's lousy for taping ducts. Here are some of the most commonly used and oft-recommended items for home repair and maintenance tasks that are in fact the wrong (or at least not the best) tools for the job.

1. Duct Tape

Like most other plastic tapes made for temporary projects, ordinary duct tape is highly prone to drying out and delaminating, leaving you with a residue of crusty crud, a loose flap of plastic, and no structural bond whatsoever. And what better surface for drying something out than a hot-air duct? The right tool for the job: Foil tape designed for sealing HVAC ductwork.

2. Liquid Drain Cleaner

Highly toxic and only marginally effective, liquid drain cleaners fail time and again, leaving you with a sink-full of poisonous solution to deal with when you or your plumber has to clear the drain manually. Interestingly, one of the leading brands of drain cleaner recently began selling a drain-cleaning tool (much like a Zip-It) along with their liquid product. Isn't this obviously admitting that their product doesn't work all that well on its own? The right tools for the job: Zip-It or other flexible hair-clog extractor; coat hanger; drain snake; or tongue-and-groove pliers, for taking apart the P-trap assembly to clean it by hand.

3. Plastic-Cone Wall Anchors

Those cheap, plastic expansion anchors that come with virtually every product requiring wall mounting are useful only if the product is lightweight and will exert a straight-down (shear) force on the mounting screw. In drywall (where most people use them), the anchors provide almost no resistance to pulling out. And why would they? They're tapered in the wrong direction, and they make no use of drywall's strongest element-the face paper. The right tool for the job: Self-drilling (screw-type) anchors for lightweight objects only; for anything that needs real support, use toggle bolts, the kind with a metal bar or alligator clip that sucks up to the backside of the drywall panel. (Learn how to use the right anchor from Derry, NH carpenter Laura Foster-Bobroff.)

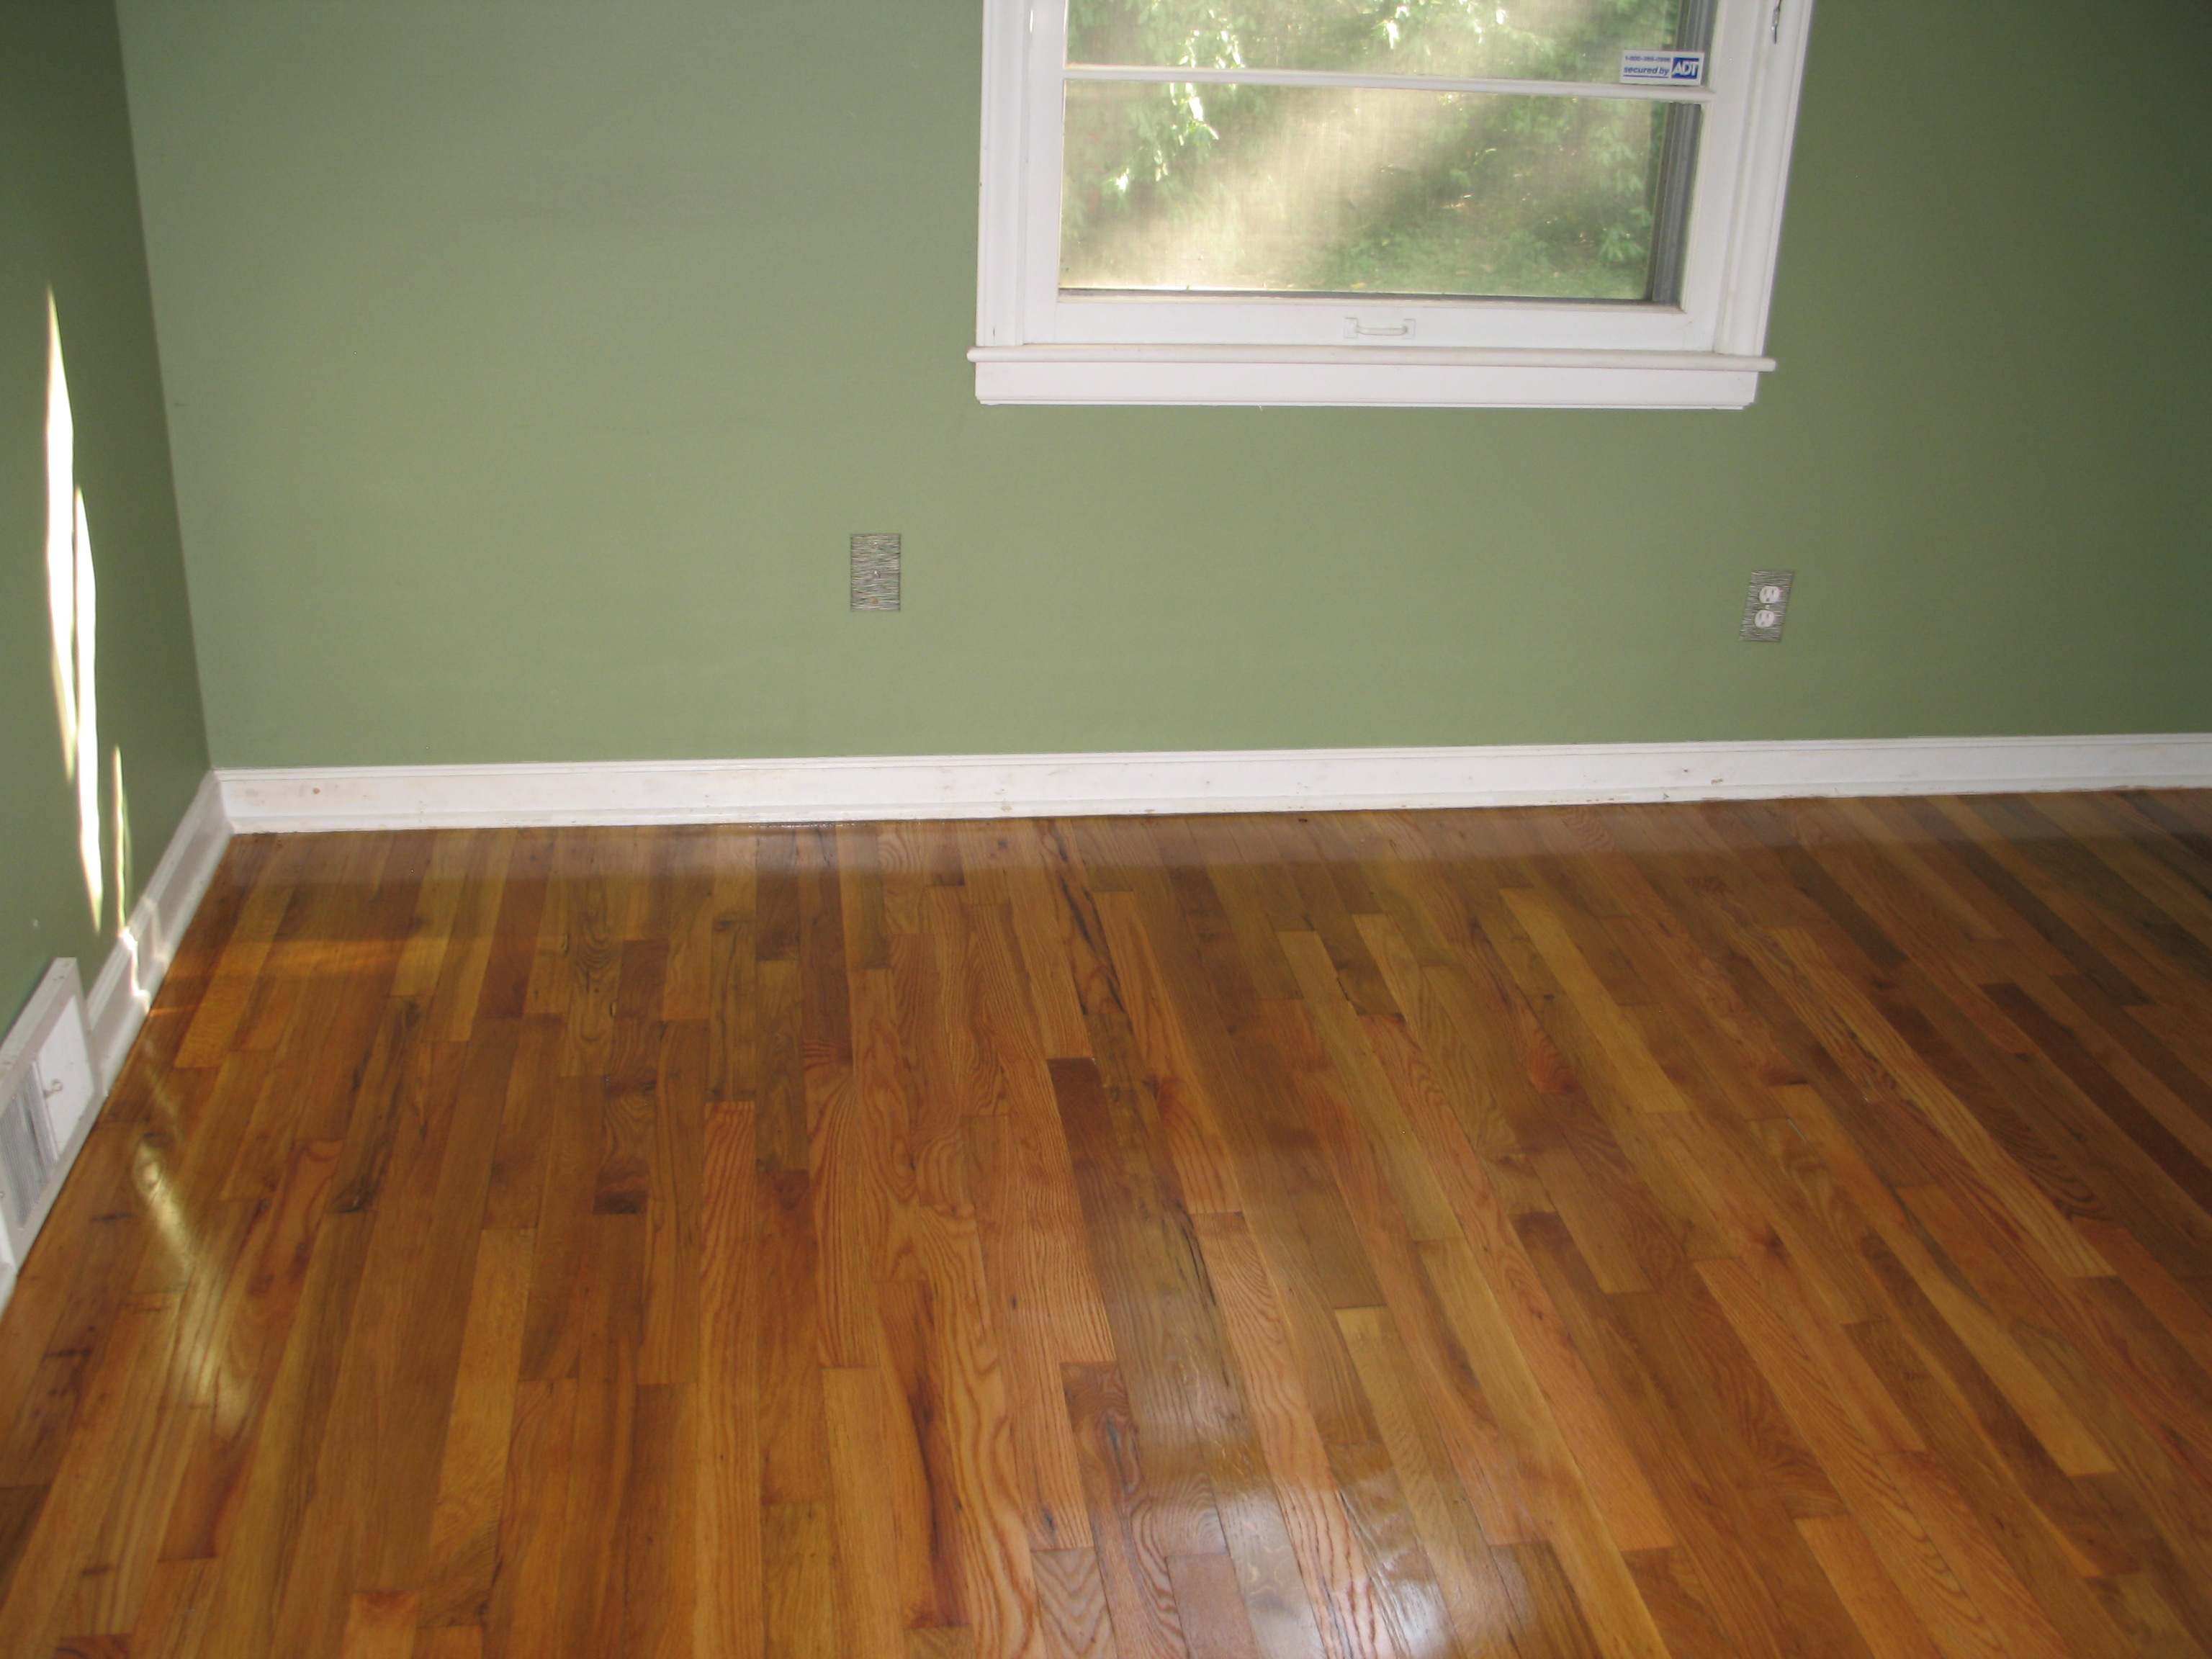
4. Soap and Wax for Wood Floors

Most hardwood floors are finished with polyurethane. This means the surface of the floor is plastic, not wood. Therefore, there's no reason to use a "wood soap" or oil soap on a polyurethaned floor. In fact, many flooring experts, including The World Floor Covering Association, recommend not using oil soaps on hardwood floors, warning that the soaps can dull the finish and impair your ability to http://www.billsfloorsanding.com/ recoat the floor with the same finish (which is a lot easier than sanding it down and refinishing). The same warning applies to all "wood floor" products containing wax. The right tool for the job: A towel slightly dampened with clean water.

5. Standard-Grade Cedar and Redwood

Cedar and redwood are commonly used as "weather-resistant" lumber for outdoor projects. However, unless you're paying top dollar for all-heart cedar or redwood, chances are the lumber you're getting is only marginally or even negligibly more rot-resistant than most other softwoods. Generally speaking, only the heartwood (the dense, dead wood from the center of the tree) is naturally resistant to decay and some insects. The sapwood (from the softer outer layers of the tree) is not so. Low grades of this lumber may be all sapwood, and many higher grades contain a mixture of sapwood and heartwood, so the wood has to be painted or otherwise sealed for decay resistance. The right tool for the job: All-heart (or all-heartwood) cedar or redwood for above-ground applications; pressure-treated lumber rated for ground-contact for structural applications where the wood is in contact with the ground.


Philip Schmidt writes for Networx. Get home & garden ideas like this on Networx.

View original post.

http://www.foxnews.com/leisure/2012/02/16/home-improvement-products-that-are-wrong-for-job/

Bona Wood Floor Cleaning Kit is recommended by GJP Floor Sanding Ltd  

For further information please contact


For more information on the Bona Wood Floor Cleaning Kits and to explore the variety of services provided by GJP, follow the link to their website at the bottom of the page.

About GJP Floor Sanding London

With over 30 years combined experience and a decade of serving London, GJP provides a highly professional floor sanding (https://www.floorsanding-london.net/category/floor-sanding/)and restoration service for all wood floor types (https://www.floorsanding-london.net/wood-floor-restoration/), including parquet floors, hardwood floors and pine floorboards. Their team serve the length and breadth of the London areaincluding Westminster, Chelsea, Greenwich, Richmond and all surrounding communities. GJP is a member of FSB, Checkatrade and Which? Trusted Trader has worked with commercial and domestic clients throughout Brighton and Sussex. From high-profile customers requiring extensive remodelling to families looking for a sophisticated finish at an affordable price.

GJP Floor Sanding London, T: 02036 978 431 W: https://www.floorsanding-london.net

http://pressmediawire.com/bona-wood-floor-cleaning-kit-is-recommended-by-gjp-floor-sanding-ltd/

The Bona Wood Floor and Hard Floor Cleaning Kits are the perfect recommendations alongside GJPs aftercare packages to ensure customers the preservation of the desired look of their room for the many years to come. With detailed and clear instructions regarding their use on their website and even more custom-tailored advice available from the team themselves, customers at GJP are certainly seeing the ongoing benefits with using such a customer-friendly company.

With recommendations from the experts themselves, customers are finding hardwood floor maintenance easier than ever.


Bona Wood Floor Cleaning Kit

Whilst they look timeless and classy wherever they go, it is not unknown to its customers that the hardwood floor requires extensive upkeep in order to look stylish and clean. Lucky for customers at GJP Floor Sanding London, theyve recommended the Bona Wood Floor Cleaning Kit to keep their professional restoration and refinishing jobs looking brand new for as long as possible.

Amy Bryce for GJP Floor Sanding says, Our customer experience is of upmost importance here atGJP and for that reason we continue our support through the restoration process and beyond. Its all part of the package for our customers as the work they put in to maintain their floors is just as important as the work we put in to refinish them. Thats why we recommend the Bona Wood Floor Cleaning Kit alongside the variety of aftercare (https://www.floorsanding-london.net/after-care/) packages our company http://www.younghouselove.com/2009/01/floor-refinishing-101/ provided to help you keep your floors looking beautiful.

Cleaning and Caring For Cork Floors

If your cork-floor has not been sealed, do not use any water on the surface of the floor because unsealed cork is highly absorbent. Only sweep an unsealed cork-floor. Sealing the floor will make the cork much more durable and last much longer. Sealers do not detract from the natural beauty of the floor.


http://www.infobarrel.com/Cleaning_and_Caring_For_Cork_Floors

Sweep cork-floors daily to remove dust, dirt and debris.

Blot up spills immediately to avoid stains. Never wipe spills because you will spread the potential stain, always blot with a white rag or white paper towel. Do not use any rags that are dyed because you may transfer the dye to the cork-floor.

Daily cork-floor Cleaning

Fill a bucket with warm water, add 1 teaspoon of a neutral all purpose cleaning solution, mix well. Dip in a soft sponge mop, wring the mop out as much as possible, mop the floor. Immediately dry with a soft cloth. Never use an overly wet mop because the cork can absorb the moisture and cause the floor to swell especially at the seams. Always sweep the floor to remove excess loose dirt and dust before http://home.costhelper.com/refinishing-hardwood-floor.html mopping.

Place padding under the legs of heavy furniture to avoid leaving dents in the surface of the cork.

Lift, never drag furniture across a cork-floor to avoid damaging the surface.

cork-floor Stain Removal

Apply a wax finish to cork-floors as recommended by the manufacturer.


Sealed cork-floor Cleaning

cork-floor Care

Unsealed cork-floor Cleaning

Never Use: Bleach, Scouring Powder, Steel Wool, White Vinegar, Lemon, Harsh Chemical Cleansers, Steam Cleaners

Any damaged cork tiles will require replacement. Laying cork tile is an easy do it yourself project.

cork-floors have many benefits, they offer a cushioning feel making standing and walking less stressful on your legs and feet. This is also a good flooring option when you have little children or seniors who may be susceptible to falls. cork-floors act as an insulator, offer some fire resistance, do not scratch or mar easily, can stand up to high traffic and pets. cork-flooring is also a mold and mildew resistant surface. cork-floors are made of the bark of the Cork Oak tree, the bark is ground up into tiny pieces and pressed together. The colors range from a golden yellow to a deeper brown. The price of cork-flooring is comparable to hardwood flooring. cork-floors come in tile forms that require glue, non-glued interlocking tiles and plank-sized pieces, which mimic the look of a hardwood floor.

cork-floors are highly resistant to stains.

For dry cork-floor stains such as heel marks use an eraser to gently buff away marks.

Any other stains can be removed with a damp, soft white rag and plain water. If plain water does not remove the stain, only use a mild detergent as explained above.

To remove grease from a cork-floor, mix 1 teaspoon of a degreasing mild dish detergent to a bucket of warm water. Dip a clean white rag into the water and soap solution and begin at the outer edge of the grease mark, gently rub the stain working from the outer edge to the center. Dip a clean rag into plain water wipe the area and dry the cork-floor with a soft cloth.

The secret confessions of hotel employees

An explosion of 5,575 comments ranging from secrets and tips to expletives and anecdotes by hotel staff and guests.

"We give free toothbrushes, deodorant, slippers and rubber ducks to anyone who asks. If you go to the front desk late at night when the auditor is working and ask, "can I have some free stuff?" They will probably give you something."

Note: We cannot verify any of these reports. Some have been edited for clarity/spelling.

Sometimes the IDs are even more disturbing than the comments (see: BayHarbourButcher or cold_white_silence) and yes, many of the comments are pretty damn disturbing.

More on CNN: Pushy guests and porn: Confessions of an Airbnb hostess

10. Timing

http://travel.cnn.com/explorations/escape/secret-confessions-hotel-employees-661771/

9. For the morbidly curious

11. VIP treatment

Heres the Reddit link. Read at your peril (be warned, you will not be able to stop) and especially not before a meal. Or a hotel stay. But first, some highlights.

Have some confessions, tips or stories of your own? Spill in the comments below

6. Free stuff

4. Bookings


"I work in a five-star hotel located in Central, Hong Kong. Yes, we have to comply with any request if the guest is considered a VIP. Not sure if this is interesting to you guys but we do have contact with local triads when prostitution is needed. We simply make a phone call and girls will be delivered faster than pizza."


"Just to clear this up, duvets are NOT meant to be slept on. I know many people are grossed out that they arent always changed but again they are not meant to be used as a blanket. There is a large warm blanket underneath with the sheets that are supposed to be used. Every single person who travels knows the horror stories accompanied with bed covers, so the right thing to do is to fold it and place it on the floor or chair."

"Hotels, even nice ones, attract the worst kind of people. Dont let your kids run around at night, make sure your door is closed properly Dont be an idiot!"

"Im a bellman and valet at a resort. I can give you free water bottles, tampons, valet parking, tours, shuttle rides, reservations, dry cleaning, hell even an upgrade to a better room if you just ASK ME. But no one ever does because they think Im just a doorman. Oh and room http://www.yelp.com/search?find_desc=hardwood+floor+refinishing&find_loc=Los+Angeles%2C+CA service isnt open all night so the kitchen cooks meals (like sandwiches and dessert and what not) and leaves them in a fridge near the front desk in case a guest checks in at like three in the morning and wants food. Anyways in the morning theres just free food sitting there, every morning I get a free cheesecake if I want, but the guest could have it if he or she asked."

5. Safety

"Yes, always use the deadbolt and/or door chain when in your room."

8. Disturbia

"Iworked at a hotel with a few friends of mine while at university. The biggest thing I found out while working there was that six months previously, a guest had hanged himself in one of the rooms and was found by the cleaner. From what I gather, the hotel was particularly empty at the time anyway and it was mid-afternoon, so they did their best to keep it quiet. The police arrived with the appropriate people, took away the body, without any guest having the faintest idea what was going on. It never even appeared in local news."

"For the slower hotel goers. Do Not Disturb signs on a door most certainly means you will not get housekeeping service at any point during the day. I don't know how many people I have had to tell this to."

"Always use the disposable cups in the rooms. The glasses/mugs are usually just rinsed in hot water in your bathroom sink."

"I worked in a youth hostel for a while; time limits were never even brought up there and that was by far the cleanest place Ive chambermaided in."

1. Simple verification

3. Washing up

7. Whos afraid?

hotel staff "Can't wait to write about what just happened on Reddit tonight ..."
"Dont book your hotel room online! The reservations are a pain in the ass to deal with. They were almost always impossible to cancel/refund. They also charge more than the actual rate and pay us less."

"The guests shouldnt be the ones scared in a hotel room (at least not in the hotel where I work). We have to hold our breath every time we enter a room that needs thorough cleaning. You can't believe the [stuff] we have to deal with sometimes. Most guests are friendly and thankful, but some people truly are animals."

2. Surprise, surprise

What happens when someone asks hotel staff to share things that are disturbing/interesting/unsanitary about hotel rooms on user-generated news site Reddit?

Laminate Floor Cleaning Equipment

Laminate flooring has gained popularity due to its ultra-durability and its resemblance to hardwood or stone flooring. It is much easier to install and is cheaper than stone or hardwood flooring. This type of flooring is easy to maintain, because it's less likely to get scratched as compared to wooden flooring. Nevertheless, proper maintenance is required for its long life.

Cleaning Instructions


Wet Cleaning

A towel or sponge head mop can be used to mop the floor. The automatic wring mop is an efficient cleaning equipment for laminate floors. The mop should be damp but not wet while cleaning the floor, because excess moisture can damage the flooring. One can also use cleaning products for cleaning the floor.

Laminate Flooring Cleaning Tips

Laminate floors have to be kept very dry because retained moisture can conduce to swelling of the planks, warping, etc. Steel wool, wax strippers, or scouring powder should never be used on laminate floors. One should also never use wax, sand, or lacquer on laminate floors. While http://fabulousfloorsatlanta.com/ cleaning the floor, never use excess water, because it causes the flooring to swell. Place adhesive felt pads on the legs of furniture pieces, to prevent them from scratching the laminate flooring. To reduce the amount of dirt accumulation on the floors, place doormats at the entrances. Removing shoes at the entrance also help to reduce the amount of dirt being deposited on the floor. Complex or expensive cleaning equipment is not required for laminate floor maintenance. With regular care and proper maintenance one can preserve the sheen of the flooring for several years to come!

http://www.buzzle.com/articles/laminate-floor-cleaning-equipment.html

It's advised to stay away from chemicals like ammonia and bleach, as they can have destructive effects on the flooring. Irrespective of the cleaner you choose, it's always best to first experiment the cleaner on a small area of the flooring to check and see if there are any negative effects. To be on the safer side, consult your flooring manufacturer for guidance regarding the most suitable cleaning product.


While most of these cleaning products are expensive, simple homemade cleaners such as vinegar and water are enough to clean this type of flooring. Vinegar prevents water spots from forming during cleaning. Mix half a cup of white vinegar with two cups of warm water, and fill it into a spray bottle. Spray the solution and mop with a damp cloth or automatic wring mop.

Dry Cleaning

Regular cleaning and maintenance is necessary to keep laminate flooring looking great for a longer period of time. Sweeping or vacuuming should be done to get rid of the dirt and dust settling on the flooring. A simple broom will do and while vacuuming use the soft brush extension. This will get rid of all the dust and loose the dirt from the floor. Use a dry sweeper cloth to wipe off the loose dirt as much as possible.

blog post

href="http://www.youtube.com/watch?v=0Tt-SGltms0">http://www.youtube.com/watch?v=0Tt-SGltms0 href=''>


blog post

href="http://www.thisoldhouse.com/toh/how-to/intro/0,,20333774,00.html">http://www.thisoldhouse.com/toh/how-to/intro/0,,20333774,00.html href=''>


Top Picks: Consumer Reports Puts Vacuum Cleaners To The Test

http://abcnews.go.com/Business/top-picks-consumer-reports-puts-vacuum-cleaners-test/story?id=12985601

A vacuum cleaner is a major purchase, and like other budget-conscious consumers, you'll want to find the best one for your money.

Consumer Reports magazine put 89 vacuums to the test, tackling more than 3,000 miles of dirty carpet. From upright models to canisters, bagged to bagless, the magazine rated its top picks.

Mandy Walker, the magazine's special projects editor, appeared on "Good Morning America" today to share the magazine's findings.

Click HERE to see more Consumer Reports vacuum cleaner reviews.


She explained how Consumer Reports conducted its testing: They ran the vacuums and measured the decibels. They used them to determine how easy they were to push around, and tested how well they cleaned carpets by running them repeatedly over carpet into which dirt had been pressed.

They evaluated how the vacuums worked on pet hair and sand on a floor, and also tested how much dust and dirt was left in the air so people with allergies could be aware, she added.

Best BuysTop Pick: Kenmore Intuition 31100, $260.

Walker said this was the best buy because it was very good on floors and carpets. An upright cleaner with http://www.familyhandyman.com/floor/hardwood-floors/how-to-refinish-hardwood-floors/view-all a bag, the Intuition has excellent tool airflow so you'll get good performance when you use a tool to clean your drapes or upholstery.


Best Bagless Upright

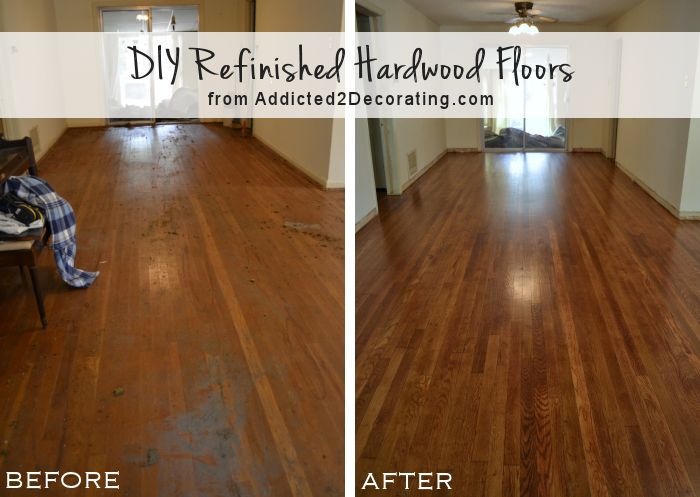
Hoover WindTunnel T Series Rewind, $130

Because you will need to replace bags, this will mean an added expense, but although some bagless vacuums can be messy to clean up, this one was good, Walker said. It worked well on floor and carpets. Walker said the magazine had stopped recommending Hoover vacuums because many of its replacement parts can be expensive if a repair ever needed to be done. But the magazine recommends this model, she noted.

Dyson DC28 Animal, $600

Consumer Reports also recommends the Dyson Animal. Walker acknowledged the device was expensive but said it had an excellent repair rate and did a great job on carpets and pet hair. It also has new technology that automatically adjusts to carpet's height, she added.

Best Inexpensive Model: Dirt Devil Featherlite Bagless, $50

The Dirt Devil is only $50. It used to be $60 and the manufacturer dropped the price, Walker said. Weighing in at 13 pounds, the machine is easy to maneuver and ideal for apartment-dwellers. It's also good for people who have lots of stairs because you can carry it easily up and down the staircase. It's also good on carpets, she said. The only drawback was that the Dirt Devil was a little noisy, Walker added.

Best Canister Vacuum: Kenmore Progressive, $300

Many people find this type of vacuum easier to maneuver and easier for stairs thant an upright vacuum, Walker said. Canisters typically did well on bare floors but poorly on carpets, but this model was great on both, Walker said.

Bagless Canister: Hoover Platinum Bagless Canister, $365

The Hoover was number one in this category, Walker said. She noted that this vacuum worked well on carpets and floors and the height was adjustable.

Click here to return to the "Good Morning America" website.

Summer DIY Safety: Know the Dangers of Linseed Oil

http://abcnews.go.com/GMA/ConsumerNews/summer-safety-diy-dangers-linseed-oil/story?id=11328546


Under certain circumstances, a common household product can combust -- or catch fire -- without any outside flame or spark.


That product is linseed oil, which so many people use to stain their wood furniture or their fence or deck this time of year. It's a natural product extracted from flaxseed. Liquid linseed oil in the can is no more hazardous than any other oil. But leftover linseed oil on rags, paper towels and so on has the unique ability to generate heat as it dries -- sometimes getting so hot that it bursts into flames.

"GMA" tossed some linseed oil-soaked rags and newspaper in a box like any homeowner might. But we did it under the close supervision of Montgomery County, Md., Fire and Rescue. Then we trained cameras on our two experiments -- one outside, another in a fire lab -- and waited.

Safety Alert: DIY Home ImprovementCharlie Shyab, a firefighter with the Washington D.C. Fire & EMS, says linseed oil fires seem to burn hot and fast.And he should know.

Charlie and his fellow Washington, D.C., firefighters got trapped in a linseed-fueled fire. Their only way out of the house? Back through the flames.

"I did say to myself, you know, you can stay up here and try and put this fire out and probably die or you can get out of here," he told "Good Morning America."

They made it, but with devastating burns over much of their bodies. The official cause, according to the fire department? Linseed oil.

Back at the "GMA" experiment, after an hour and we checked the linseed-soaked rags with a thermal imager. Glow-in-the-dark spots on the rags showed where the linseed oil started to grow hot.

"Obviously you're getting the heat build-up in there," Donny Bord, a firefighter with Washington D.C. Fire & EMS, told "GMA."

Thermal probes we had attached confirm that the temperature has risen from 87 degrees http://www.armstrong.com/flooring/refinishing-hardwood-floors.html to 110 degrees.

Here's how it happens: when linseed oil is exposed to air, it combines with the oxygen molecules. This chemical reaction creates heat. If the linseed oil is on something like a cotton rag, it can catch fire at as low as 120 degrees -- with no outside spark.

"It is certainly among only a few items that gives off heat when it comes in contact with other natural products like cotton. And given the right atmosphere, the right amount of ventilation, it does self ignite. So that makes it extremely dangerous," said Chief Dennis Rubin of the Washington D.C. Fire & EMS.

In fact, linseed oil caused the biggest high rise fire in U.S. history. In 1991, Meridian Plaza in Philadelphia burned for 19 hours. The investigation showed workers left linseed oil-soaked rags in a vacant office.

Two hours into our experiment, we spotted smoke. The pile we left outside smoldered first, and then built quickly. Smoke curled from the rags indoors soon after.

"People simply forget the potential deadliness of simple cloth and linseed oil," Rubin said.

This historic Albuquerque theater and saloon went up in flames after a wooden bar was refinished with linseed oil. Workers at a neighboring business that was damaged made up T-shirts and posted a YouTube video in protest.

Three hours and 10 minutes into our experiment, suddenly flames burst from the rag. All without outside

That's why they call it spontaneous combustion.

The rags inside go up in flames, too.

And that is the unique power -- and danger -- of linseed oil.

Linseed oil in the can is fine. Just keep it away from heat and flames. The reason linseed oil doesn't catch fire when you use it on wood is that it is spread out, so it doesn't heat up.

Balled-up rags and other debris from projects are the real problem, because the oil is concentrated where it can heat up and the rags, providing fuel for the fire.

Linseed oil manufacturers suggest putting rags, paper towels, etc., soaked with linseed oil in a metal can full of water. You'll want to tightly seal the lid and take the can to your local hazardous waste site for disposal.

Web-extra InformationLinseed oil is the most likely to self-combust, according to the National Fire Protection Association, but there are other materials that have been known to do the same under certain circumstances.

Other Materials That May Self-Combust

Turpentine

Fish oil

Lard

Coconut oil

Cod liver oil

Castor oil

Click here to return to the "Good Morning America" website.

DIY: How to Refinish, Seal, and Maintain a Slate Tile Floor

Plan how much time you think you will need for your project. Add two days. This is how much time you will actually need. I planned one day for stripping, and assumed we would be done by 3pm. Then we would wait till 3pm the next day and seal 1/2 the house, picking the kids up at daycare by 6pm. The next morning, we would drop them off, seal the rest of the house and have a blissful evening to ourselves for dinner and a movie. The reality? Stripping became a nightmare. We spent 2 full days doing it, finishing at 2:30 am on day 2. Meaning we couldn't start sealing until 2:30 am on our final project day. (I, by the way, had to be at work by 6:30 am the following day.)

Take the time to make your sealer application very even. Toss down the polish with a sponge! Easy, right? The reality? Applying that second coat is a lot like painting (or putting on nail polish). There's a fine line between too much and too little, and the resultant streaks show up in the final product. Take your time (but not so much time the sealer gets tacky while you work with it), and, if you have to break the project in two, choose a stopping point that makes sense. We had to leave out one small section of the room where we had moved all of our big furniture pieces. The overlap line between day 1's polish and day 2's polish is obvious. Luckily, it lines up with where our couch goes, but it would have been better if we'd been careful to polish up to a specific grout line so we had a starting point for day 2.

Splurge a little. Unless money is really tight, and I mean really tight, get yourself a wet vac and a rent a floor buffer. I originally thought we would scrub the floor with bristle brushes by hand and soak up the "slurry" left after stripping with rags and a mop. The reality? My brilliant husband was amazing enough to insist that we borrow a buffing machine instead. I broke down and bought the $10 squeegee attachment for our wet vac. I'm fairly certain that our sanity would not have survived this process without those two items. (The hand scrubbing might be all right if you are only doing a small area. We were attempting about 1,000 square feet.)

Collect your resources. I did my research ahead. I spent weeks online reading forums and talking to co-workers. I thought I knew every detail. The reality? Questions came up. We were uncertain of how the tile should look when we were done stripping. We needed to know if we could seal after 20 hours instead of the recommended 24, etc. This is one area we did right. I chose a sealer (Aquamix) that had a fantastic technical support line. (Thank you, Barbara!) The 800 number was right on the bottle, and they actually had answers. I also made use of the knowledge of the janitorial supply manager mentioned above. When all else failed, and I needed advice, I even called a few local flooring contractors and picked their brains. If you are polite and gracious (and mindful that their time is money), I find most people who have some level of expertise will be willing to share it with you.


Oh, and in case you were wonderingI'm still married.

Find a good janitorial supply place and make friends with a manager. I started my purchasing journey at Lowe's and Home Depot. This was fine for most of our supplies, but they didn't have the pads we needed for the buffer. The reality? Once we went to a janitorial supply place to get the pads, we found the manager there to be a very valuable resource. He advised us that the "industrial strength" stripper at the hardware store, was nowhere near as strong as the one on his shelf. He also suggested we buy an extra stripper pad and alternate them, rinsing in between. Getting the bristles unclogged in this manner and using a stonger stripper really helped.

At the end of the day (actually four days) my husband and I finished the biggest DIY project we have yet attempted. It was exhausting and frustrating, like most major home projects. But last night, I spilled some water on the floor, and it beaded up instead of soaking in! I nearly did a jig. And this morning when I got up, I was greeted by a shining, clean and "un-foodified" floor. Hopefully, the floor will continue to look as good as it does today, and the time I save in maintenance going forward will more than make up for the four crazy days I spent cleaning, sealing and stripping.

http://hubpages.com/living/Refinishing-a-Tile-Floor

If you can, find out what is actually on your floor by any means necessary. If I ever move, and that won't be anytime soon considering how much time I just put into re-doing my floor, I will ask the owner exactly what was used to treat any flooring. We assumed that the only thing on the http://hardwoodflooringrefinish.com/ floor was the polish the previous owner had told us to use. The reality? We think they originally sealed the floor and then polished on top of it. This means that after 2 days, 3 chemical strippers, a steamer, a brass brush, a professional buffing machine with stripper pad, and various attempts at scrubbing, we still had patches of some sort of sealer or polish on our floor. Stuck at a point of no return, we decided to attempt to seal over them and hope for the best. (So far, this seems to have worked out okay. If it holds, we're very lucky. If it doesn't, we'll be buying some new area rugs.)


The steps above are simple enough, but nothing ever goes as planned. In our house, Murphy's is the only law. If you'd like to learn from my mistakes, rather than your own, read on.

View older posts »